Non-Dismantle Chemical Wash Process — Step-by-Step
Arrival, pre-wash inspection, chemical flush, drainage, blower, anti-bacterial spray, performance reading. The full Non-Dismantle workflow.
Updated:
We operate as the dedicated chemical wash division of Billy Aircon, a Singapore company founded in 2003 and now 26 people strong. This extensive experience shows us that a standard water wash often falls short against local humidity.
Our technicians regularly see biological slime and stubborn biofilm accumulating deep within residential units. This hidden grime forces the compressor to work much harder and consume more electricity.
We look closely at National Environment Agency efficiency guidelines to understand the true cost of these dirty coils.
Industry data confirms that unwashed coils drastically lower energy ratings and spike monthly bills. Our complete 8-step Non-Dismantle Chemical Wash process tackles this problem directly. The following breakdown explains the specific tools used, the exact cleaning process, and the results you can expect during a typical visit.
The On-Site Non Dismantle Aircon Wash Process
We run through the exact same 8-step process for every single non-dismantle chemical wash. A standard visit typically takes 30 to 45 minutes per air conditioning unit.
Our structured approach ensures consistent results across different brands and models. Below is a detailed look at what happens during each stage of the appointment.
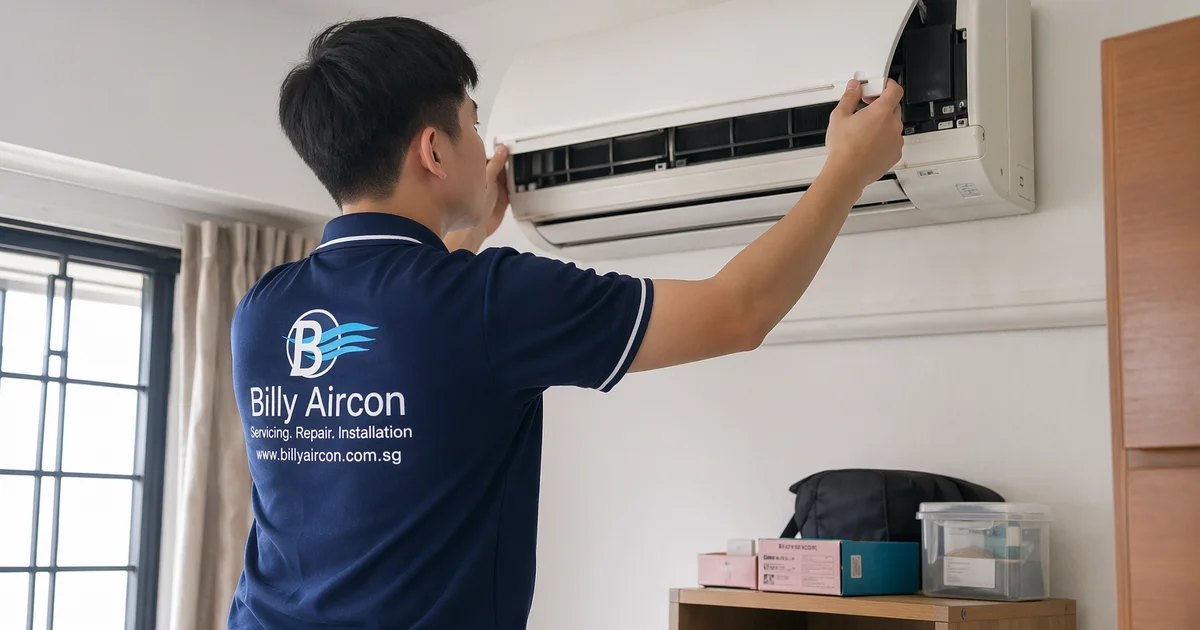
Step 1: Arrival and Walkthrough (5 min)
We start the visit by confirming the total unit count and their locations within your home. The technician will ask you about specific symptoms, such as strange smells, a sudden drop in cooling, or any signs of ice and water leaks.
Our team then unfolds a specialised equipment kit right in front of you. This kit includes a waterproof ground sheet, an anti-bacterial spray, and a Testo 405i thermal anemometer for highly accurate airflow readings.
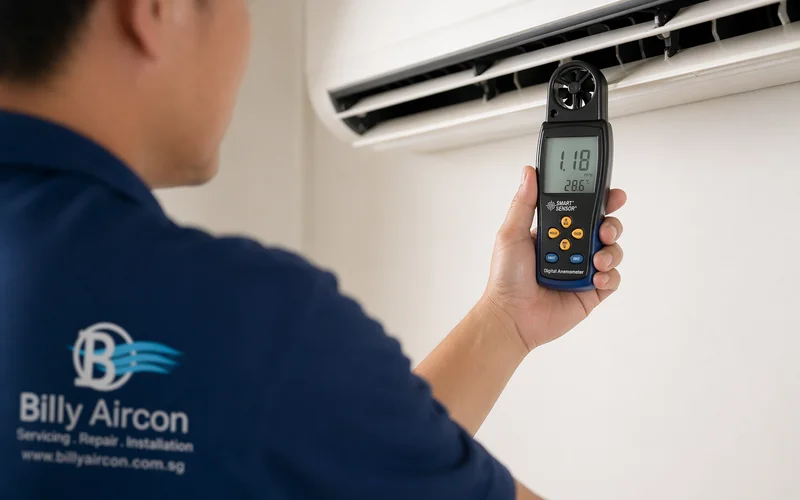
Step 2: Pre-Wash Inspection and Performance Reading (5 min)
We always power on the unit to establish a clear baseline before any cleaning begins. The digital Testo 405i anemometer measures the precise airflow velocity directly at the vent.
Our technician also records the temperature differential between the output vent and the ambient room air. These initial metrics provide a factual comparison point to prove the effectiveness of the wash later.
We remove the plastic cover and photograph the current condition of the evaporator coil for your service record. Visual evidence helps you see exactly what was hiding inside the machine.
Step 3: Ground Sheet Setup (3 min)
Our technicians carefully position a heavy-duty waterproof ground sheet under the entire work area. Splashes can happen, so any surrounding furniture or electronics get fully covered with protective plastic.
We then verify a clear and safe access path to the nearest drainage point, usually a bathroom. Proper setup protects your flooring and ensures a mess-free cleaning process.
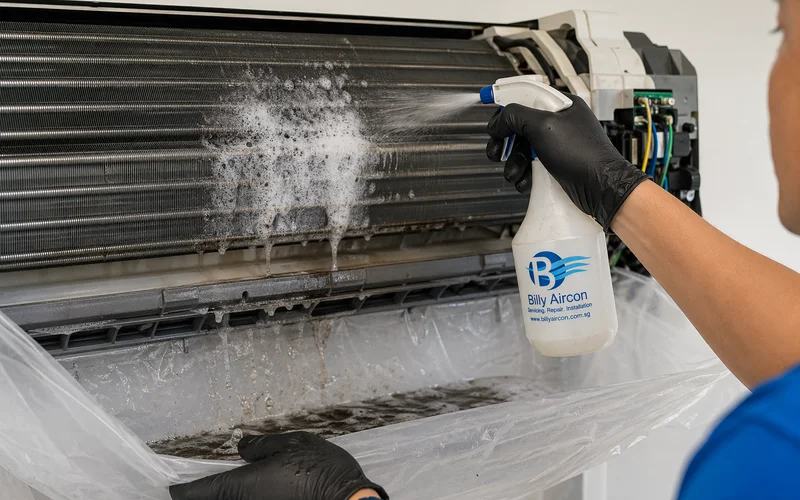
Step 4: Coil Chemical Flush (10 to 15 min)
Our team applies a hospital-grade alkaline detergent directly to the exposed evaporator coil fins. Trusted industrial brands like Mr McKenic Eco-Friendly Alkaline Coil Cleaner work exceptionally well in breaking down thick grime.
We standardise our procedure by diluting the solution to a one-to-three ratio for typical residential buildup. The chemical needs five to ten minutes of contact time to dissolve the stubborn biofilm completely.
Our crew places a custom drip tray below the unit to safely collect all the dirty runoff. A thorough fresh water rinse follows immediately to flush the dissolved contaminants down the drainage path.
Step 5: Drainage Pan and Pipe Flush (5 min)
We pour a targeted chemical solution straight into the drain pan to break down blockages. High humidity in Singapore frequently causes a thick, jelly-like biological slime to choke these narrow pipes.
Our team flushes the line with water and watches the outdoor condensate drain to verify a strong, clear flow. Partial blockages require additional chemical cycles until the water runs perfectly clear.
We use this specific aircon wash procedure singapore residents rely on to prevent major indoor water leaks.
Step 6: Blower Fan Clean and Filter Wash (5 min)
The technician accesses the cylindrical blower fan wheel directly through the main cover opening. Our crew cleans the surface using an anti-bacterial solution and a targeted wipe-down process.
A mild soap solution washes dirt and dust from the standard air filters. We leave full blower wheel removal to the full-dismantle overhaul service.
The clean filters go back into the unit once they are completely dry. Our process immediately reduces the physical strain on the blower motor.
Step 7: Anti-Bacterial Spray (5 min)
A hospital-grade anti-bacterial spray provides the final treatment for the internal components. We coat the cleaned coil, the drain pan, the blower wheel, and the interior plastic cover thoroughly.
This specific solution achieves a verified 99.9 percent kill rate on surface microbes and mould spores. Our team ensures the entire application dries fully within 30 minutes.
The room simply smells fresh and clean because this treatment leaves no residual chemical odour.
Step 8: Reassembly and Post-Wash Performance Reading (5 min)
We securely replace the plastic cover and power the unit back on for final testing. The digital anemometer measures the restored airflow velocity right at the vent.
Our data shows a typical airflow improvement of 15 to 50 percent above the pre-wash baseline. A final temperature differential check guarantees the compressor is cooling efficiently.
Closeout
We wipe down the waterproof ground sheet and pack up the equipment kit efficiently. The area around the indoor and outdoor units gets a final visual check to guarantee absolute cleanliness.
Our digital system then automatically generates a detailed receipt and sends it directly to your mobile phone. This paperless record keeps all your maintenance history in one easy-to-find place.
The receipt includes several key details:
- Service date and exact property address
- Total unit count and specific per-unit notes
- Anemometer performance readings from before and after the wash
- High-resolution photos of the coil condition upon request
- A 90-day workmanship warranty card for your peace of mind
We typically complete this entire workflow in your home within 45 to 60 minutes for a single unit. This fast timeframe includes the initial setup, the full chemical treatment, and the final cleanup.
What Multi-Unit Jobs Look Like
Our dispatch assigns a paired team of two technicians for standard multiple-unit HDB jobs. This parallel working strategy drastically cuts down the total time spent in your home.
| Job Size | Typical Property Type | Estimated Completion Time |
|---|---|---|
| 1 Unit | Master Bedroom only | 45 to 60 minutes |
| 2 Units | 3-Room HDB | 60 to 90 minutes |
| 3 Units | 4-Room HDB | 90 to 120 minutes |
We have the first technician perform the active chemical flush on the primary unit. Meanwhile, the second technician sets up the ground sheet and starts the pre-wash inspection on the next machine.
Our method turns the mandatory chemical contact time on one coil into highly productive setup time elsewhere. Your daily schedule gets disrupted far less when the team coordinates their efforts smoothly.
What You Do During the Service
We require your signature at the start to approve the inspection, and your presence at the end to review the results. The middle portion of the appointment requires zero effort from you.
Here is exactly what we need from you at each stage:
- Beginning: Sign off on the initial inspection findings and confirm the final price.
- Middle: Feel free to work from home, relax in the living room, or handle chores.
- End: Walk through the final airflow readings and receive your digital service receipt.
Our team always pauses and seeks your explicit approval if any detail changes the intended scope. An unexpected discovery, like a severe blockage needing an overhaul, will never be actioned without a discussion first.
Post-Wash Care
We ensure your air conditioner requires absolutely no immediate maintenance after the technicians leave. The system will run normally and push out colder air from the very first cycle.
Our data shows that performing a basic filter wash every four weeks significantly extends the effectiveness of the chemical treatment. Clean filters prevent new dust from sticking to the freshly washed evaporator coil.
We advise scheduling your next non dismantle aircon wash process three to four months from today to prevent heavy buildup from returning.
You can review our detailed Non-Dismantle Wash Frequency guide to understand the complete recommended maintenance cadence and secure your next booking.
Frequently Asked Questions
Will you put down ground protection? expand_more
Do you show a performance reading at the end? expand_more
What's the last thing you do before leaving? expand_more
Related Guides
How Long Does a Non-Dismantle Chemical Wash Take?
Per-unit and multi-unit timing for Non-Dismantle Chemical Wash. What slows the job and what paired teams achieve.
Non-Dismantle Wash Frequency — Why Every 3 to 4 Months in Singapore
Why 3–4 months fits Singapore humidity, what tips cadence shorter, and when to upgrade to Full-Dismantle Overhaul.
Will a Non-Dismantle Wash Fix Weak Cooling and Mild Smell?
Where Non-Dismantle Wash solves weak cooling and mild smell, and when symptoms cross into Full-Dismantle Overhaul territory.
Standard Aircon Servicing vs Non-Dismantle Chemical Wash
What standard servicing covers, what it can't reach, and why 4× per year servicing won't replace quarterly chemical wash in Singapore.
Learn more about Non-Dismantle Wash
WhatsApp us for a same-day chemical wash quote, or call our team directly.